One form of photography that I really enjoy is long exposure photography. I find this kind of photography pleasing to view and also a lot of fun to create. Longer exposures allow the photographer to express movement in the final image. If the exposure is long enough, it can give the illusion of flattening out the ripples and waves when photographing water or can create wispy clouds when incorporating skies into the photo. Longer exposures are most often used in landscape photography, architectural or astral photography.

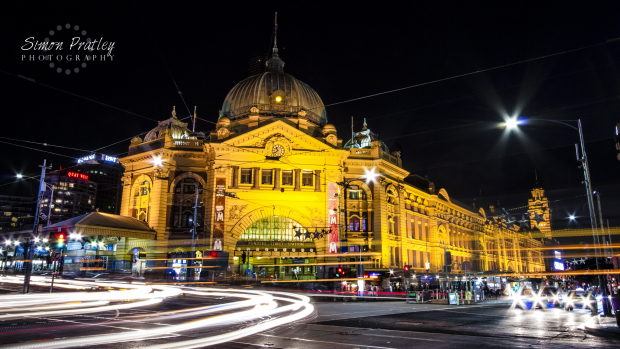
ISO100, f/16, 10 seconds: In this image a 10 second exposure was long enough to capture light trails from the passing cars and tram. Also the small aperture used turns the car headlights and street lights into stars.
Longer exposures work by allowing the camera’s shutter to stay open for an extended time. So if taking a photo where there is moving water or a cloudy sky, a longer shutter speed will capture more movement and make for a creative shot. Exposures from ½ a second, to 5 seconds, to 5 minutes are common. However unless you are a real enthusiast or pro photographer with neutral density filters, which reduce the amount of light entering the camera, the best times of the day to do long exposures are early in the morning or late in the afternoon/evening when there is less ambient light.
The trick to creating an engaging long exposure photo is to make sure to have a static element in the frame, otherwise the long exposure will look like a blurry photo. If taking a photo of water, rocks or a pier could be used the static element and therefore the water will be the only element moving. If taking a photo where there are clouds, a building or mountain could be the static element and as a result the clouds will be the only feature moving.

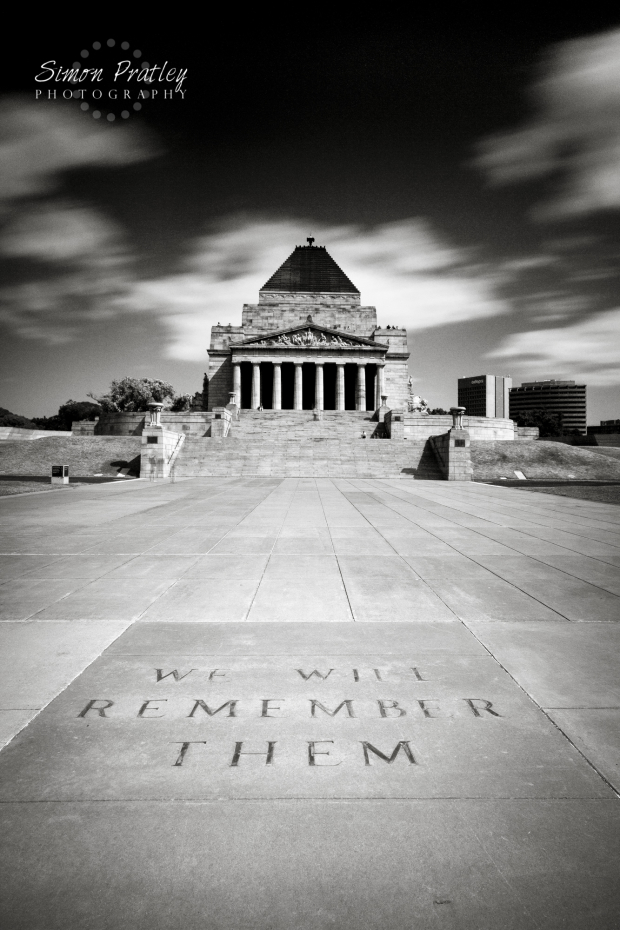
ISO100, f/16, 30 Seconds; A 30 second exposure was used in this photo to capture the movement of the clouds, creating a more dynamic image.

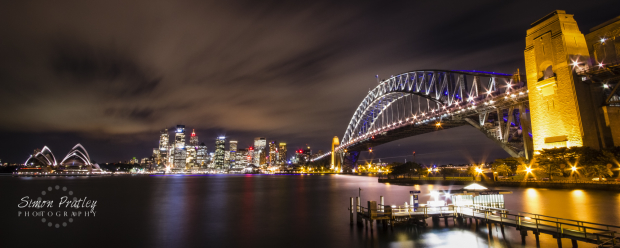
ISO100, f/16, 120 seconds: The long exposure of 2 minutes has made the clouds wispy and the water reflect the city lights.
This experiment will depend on how much ambient light there is where you are located. Try early in the morning or in the evening when there is not too much ambient light. Too much light results in a faster shutter speed and the long exposure won’t take effect.
The longer the exposure, the more obvious the effect of this technique. On the other hand sometimes only a few seconds will give the desired result. Next time you are at the seaside or at a river try this technique with the water. It is a lot of fun and can have some very interesting results that give a variance to your photography portfolio.