

I love to get out of the house to go shoot photos. And I love to just pick the camera up and start shooting with out having to think too much about what setting my camera is on. This is because I know how I left it from the last time I used it. But how can I remember that?
Usually when I am on a photo shoot I am really into what I am doing and by the time I have finished I am really tired and just want to put my camera away. Over time however, I have trained myself to remember to do a few easy things when finished photographing to be ready for the next photo session. These are now my personal “default settings” that I know my camera will be on when I next pick it up.

Fishing Boats at Calella De Palafrugel
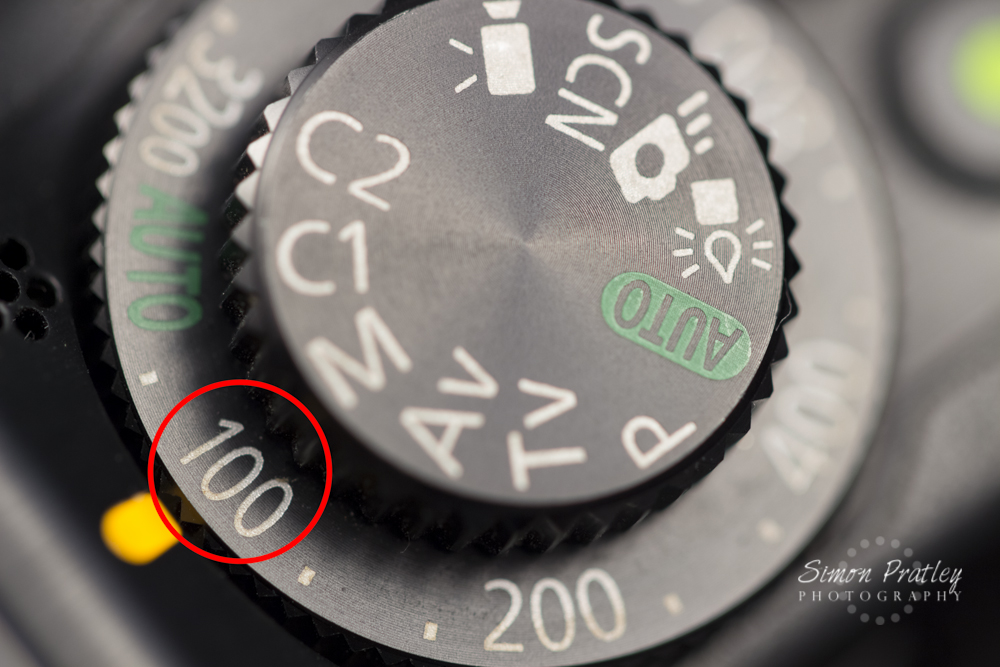
When I am out shooting there are so many lighting scenarios I can find myself in. One day I could be shooting during the middle of the day at ISO100, the next in a dark setting at ISO1600 and the next at ISO400. As ISO100 is the optimal setting for most cameras I find it best to set my camera to this when I have finished shooting. Some cameras go down to ISO50, so if you have a camera like this you could use that setting as well.
There is nothing worse than using the camera one evening at ISO1600 and the next morning shooting for a few hours before realising that I had forgotten to change the ISO back to a lower setting! This is why I have made it instinctive to change my camera back to ISO100 every time I finish shooting.
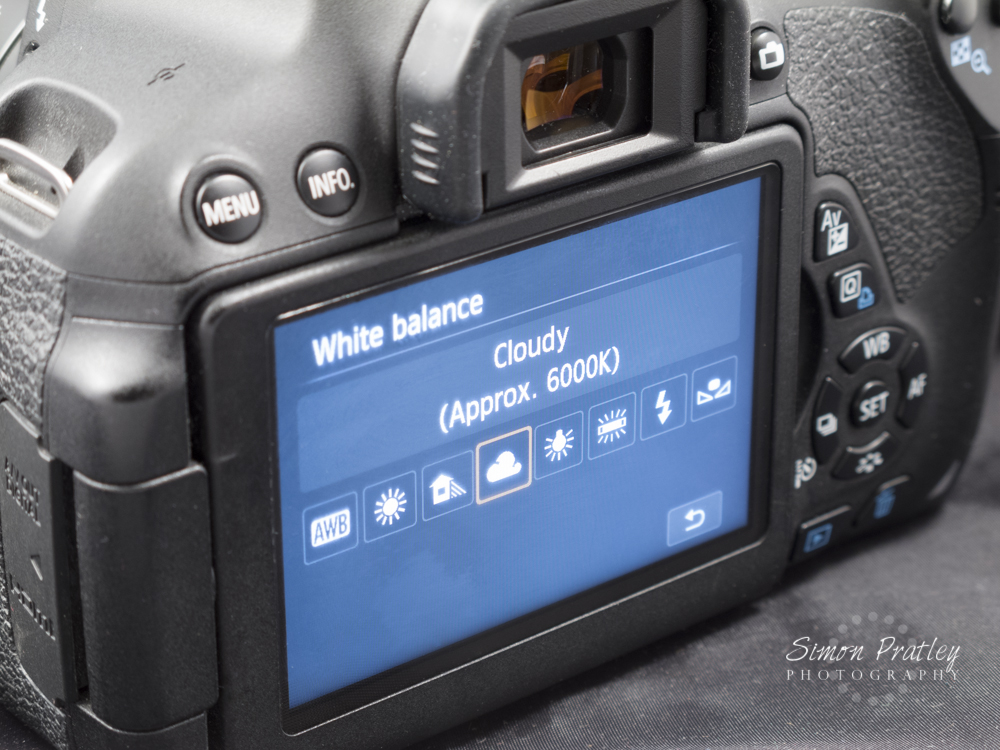
As with the ISO, every shooting scenario has different lighting. Different lighting sheds a different colourcast and we need to change our white balance to suit. If we have been shooting under fluorescent lighting and have our white balance set to Fluorescent the camera adjusts the shot to take away the green colour cast. A photo taken on this setting looks fine under fluoro lighting, but taking a photo on this setting under any other lighting looks really blue and terrible.
I find that resetting my camera back to the Daylight or Cloud white balance when I have finished is a safe starting point for the next photo shoot. Usually if I need to take photos with fluorescent or any overhead lighting, I instinctively know to check my white balance and will adjust for that accordingly.

I usually have my camera in Aperture Priority (Av), or in Manual Mode (M) and I like to have my aperture set to its widest or lowest f/stop number as a default. This is my personal preference but you might prefer something more in the middle of the scale like f/5.6. It doesn’t matter which setting you prefer as long as you always go back to that setting so it becomes instinctive and you know how many clicks to the left or right you need to make to get the correct exposure. If the camera is always left on this setting when you have finished shooting, you know straight away where you are starting from the next time you pick up the camera.
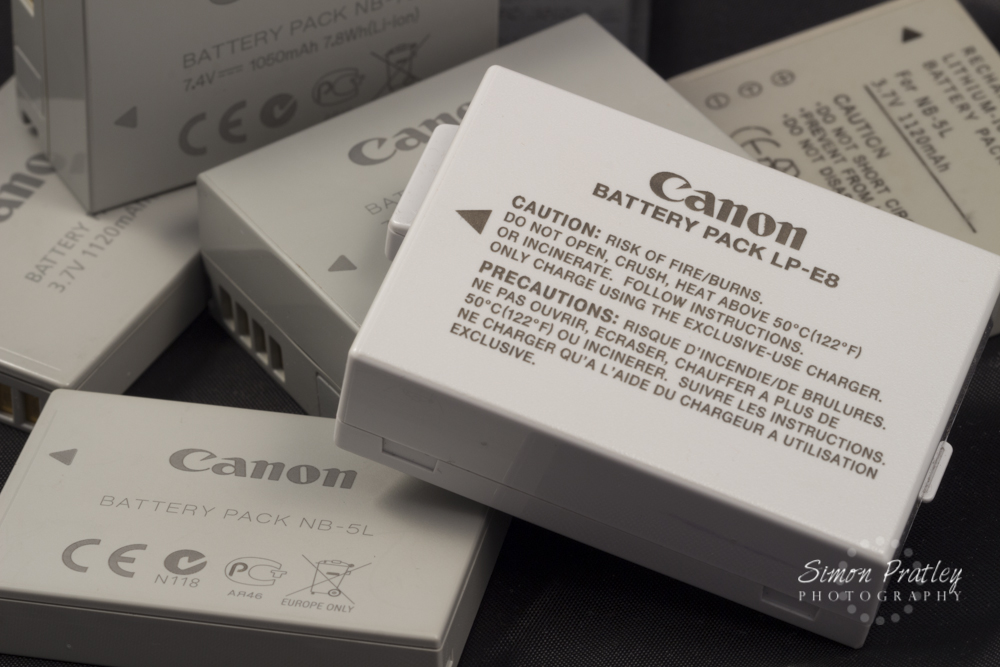
This is arguably the most important thing to remember when you have finished shooting for the day. Recharge the camera’s batteries. I always carry at least one spare battery, but it is so important to always make sure that the battery in the camera and the spare batteries are recharged and ready to go.
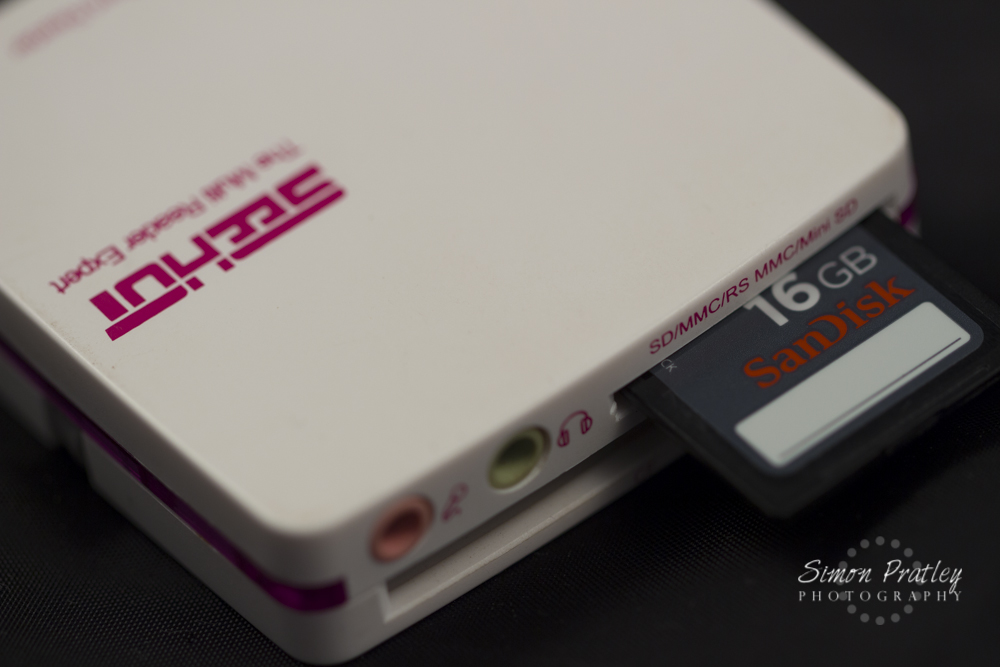
By importing the photos it frees up the memory card and also different photo shoots don’t end up getting mixed together. Usually when I get home from a photo shoot I can’t wait to import my photos from the memory card, so for me this is an easy step to remember.
I have found that some digital cameras re-sort the order of photos when I delete photos I’m not happy with in camera. By the time I import them into my computer they are in a different order to when I took them and different photo shoots can be mixed together. It’s such a pain. The best way to avoid mixing photo shoots together is to import the photos into the computer after each photo shoot and start the next shoot with an empty memory card.
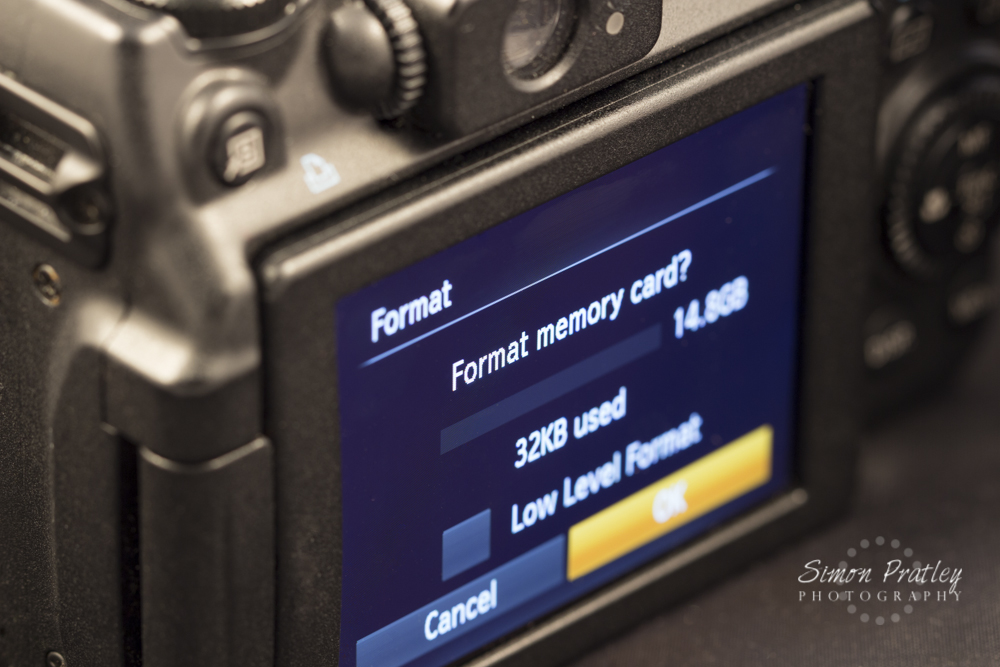
Now that the photos have been imported to the computer, always remove the memory card from the computer or card reader and put it back in the camera straight away. The next important step is to format the card. By formatting the memory card it removes all info and leaves the card ready for the next photo shoot. If you simply delete the photos, there are still folders and other data on the card which over time will slow the memory card down.
Some cameras allow what is called a low level format. This is slower but restores the memory card to how it was when it was bought it. This isn’t necessary to do all the time, just every now and then if the card seems to be getting a little slow when out taking photos. To start a photo shoot with a clean memory card avoids problems and makes life easier.
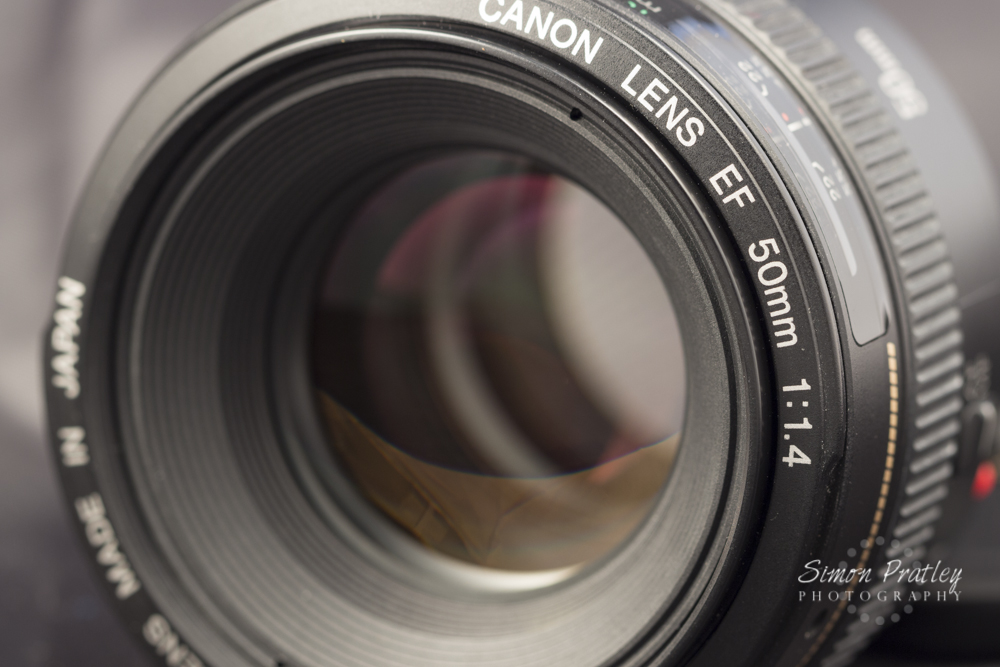
All too often I see people shooting photos with a dirty and smudgy lens. Yuck! It always makes me wonder why they don’t question the reason their photos are continuously blurry. Another thing to check for is dust on the lens. Dust can make light refract in irregular ways, creating odd and unwanted points or distractions in the photo. The best way to keep your lens clean and under control is to always have a cleaning kit handy.
By remembering to follow these few easy things when finished photographing for the day I am sure they will become second nature and part of your daily routine. There are possibly more things to be added to this list. Feel free to make your own list and follow what works best for you.