

Image Stabilisation or Vibration Reduction, is a mechanism used in many modern high end compact cameras, DSLR cameras and DSLR lenses to help in the reduction of camera shake. The natural pulse in the photographer’s hands when taking hand held photos in low light situations is usually what causes camera shake. The result is a blurry picture.
The imprecise image can sometimes even look like a double exposure. If the shutter speed is fast enough, the shake is not noticeable. As low light situations need the shutter to be open longer to make the exposure, the photographer runs the risk of camera shake in their images when shooting hand held. The inclusion of image stabilisation in the camera or camera lens gives additional sturdiness and as a result, the opportunity to have sharper images.
Though image stabilisation is becoming more common, even if not yet a standard feature, the idea for this technology has been around since the 1970’s. However this technology wasn’t implemented into consumer cameras until Canon introduced it in their 75-300mm DSLR lens in the mid 1990’s. In the late 1990’s Canon revised their image stabilisation system and brought out a second generation that has paved the way for what we are using today. Panasonic were the first to put this technology into their compact cameras in the mid 2000’s and these days even some mobile phones have image stabilisation built in.
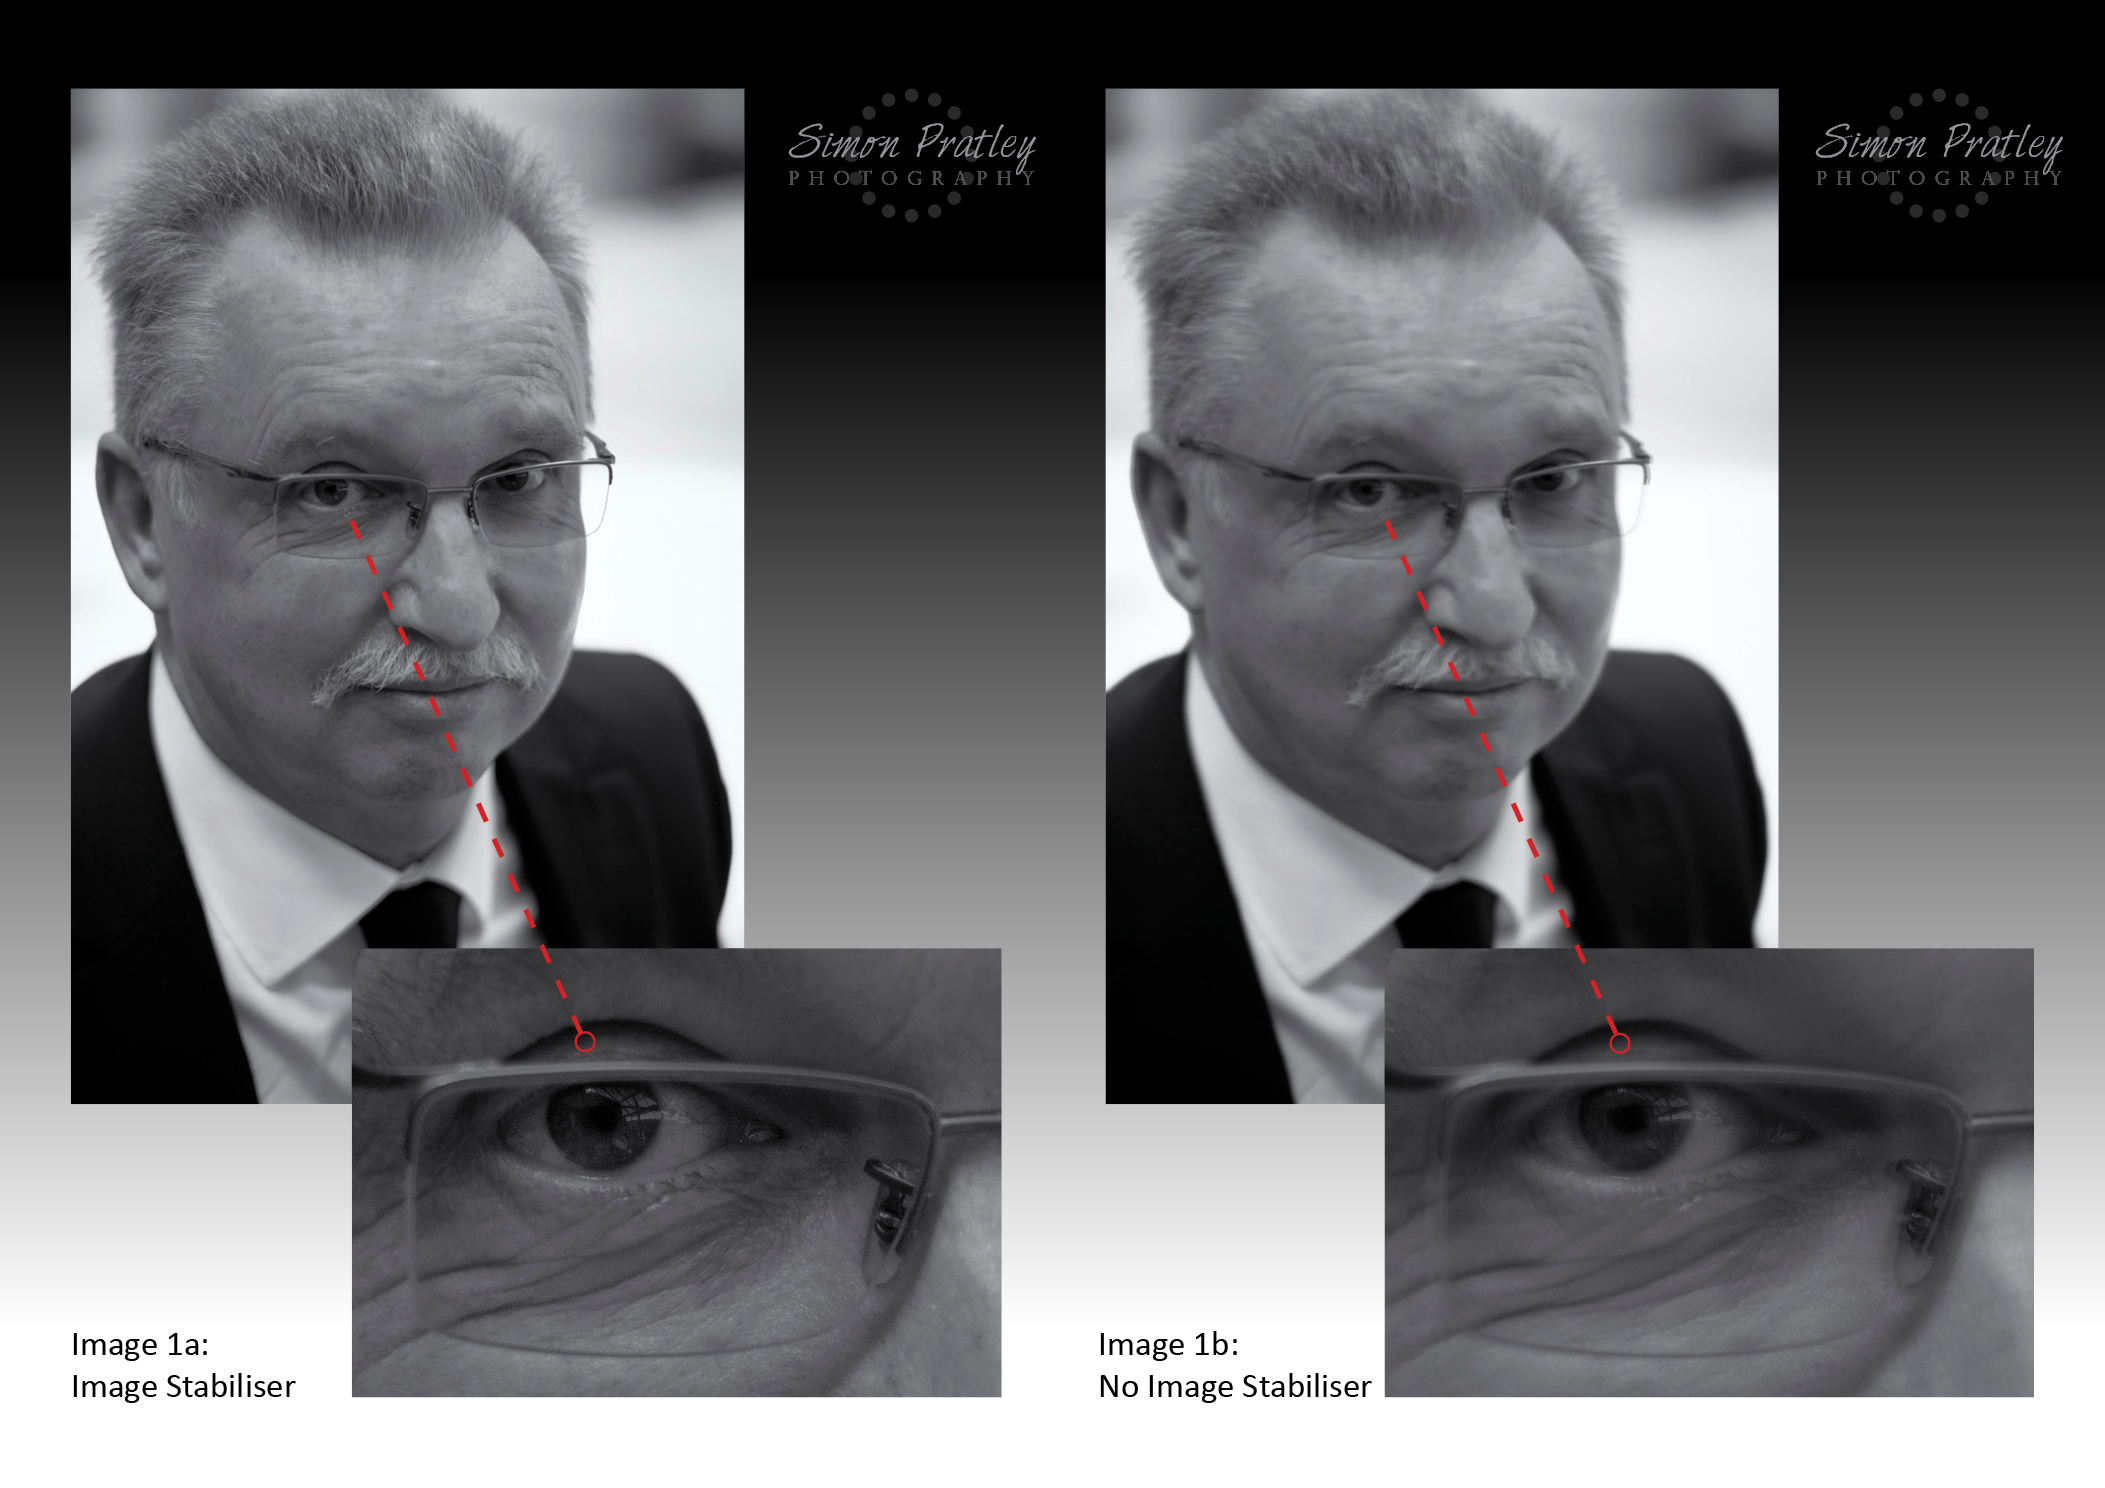
Note how the Image Stabiliser made a huge difference in this low light shot.
The image stabilisation in cameras is typically located in the menu area of the camera. On camera lenses there is usually a button on the barrel of the lens that can be switched on or off. As a general rule the image stabilisation can be left on for most photographic situations, though it only makes a difference when shooting photos with a slow shutter speed. When using a compact camera, anything under 1/30 second is going to show camera shake. In low light situations like this is where the image stabilising setting becomes your new best friend.
With DSLR’s, depending on what size lens you are using the rule of thumb is 1/Focal Length is the minimum speed to avoid camera shake. What that means is if you are using a focal length of 50mm; images under 1/50th of a second could show signs of camera shake. With the option of image stabiliser, you might be able to shoot hand held two stops down at 1/25th or 1/10th of a second. The same idea with a focal length of 135mm; under 1/135th second may incur camera shake. Having image stabiliser may allow sharp images down two stops to 1/30th second.
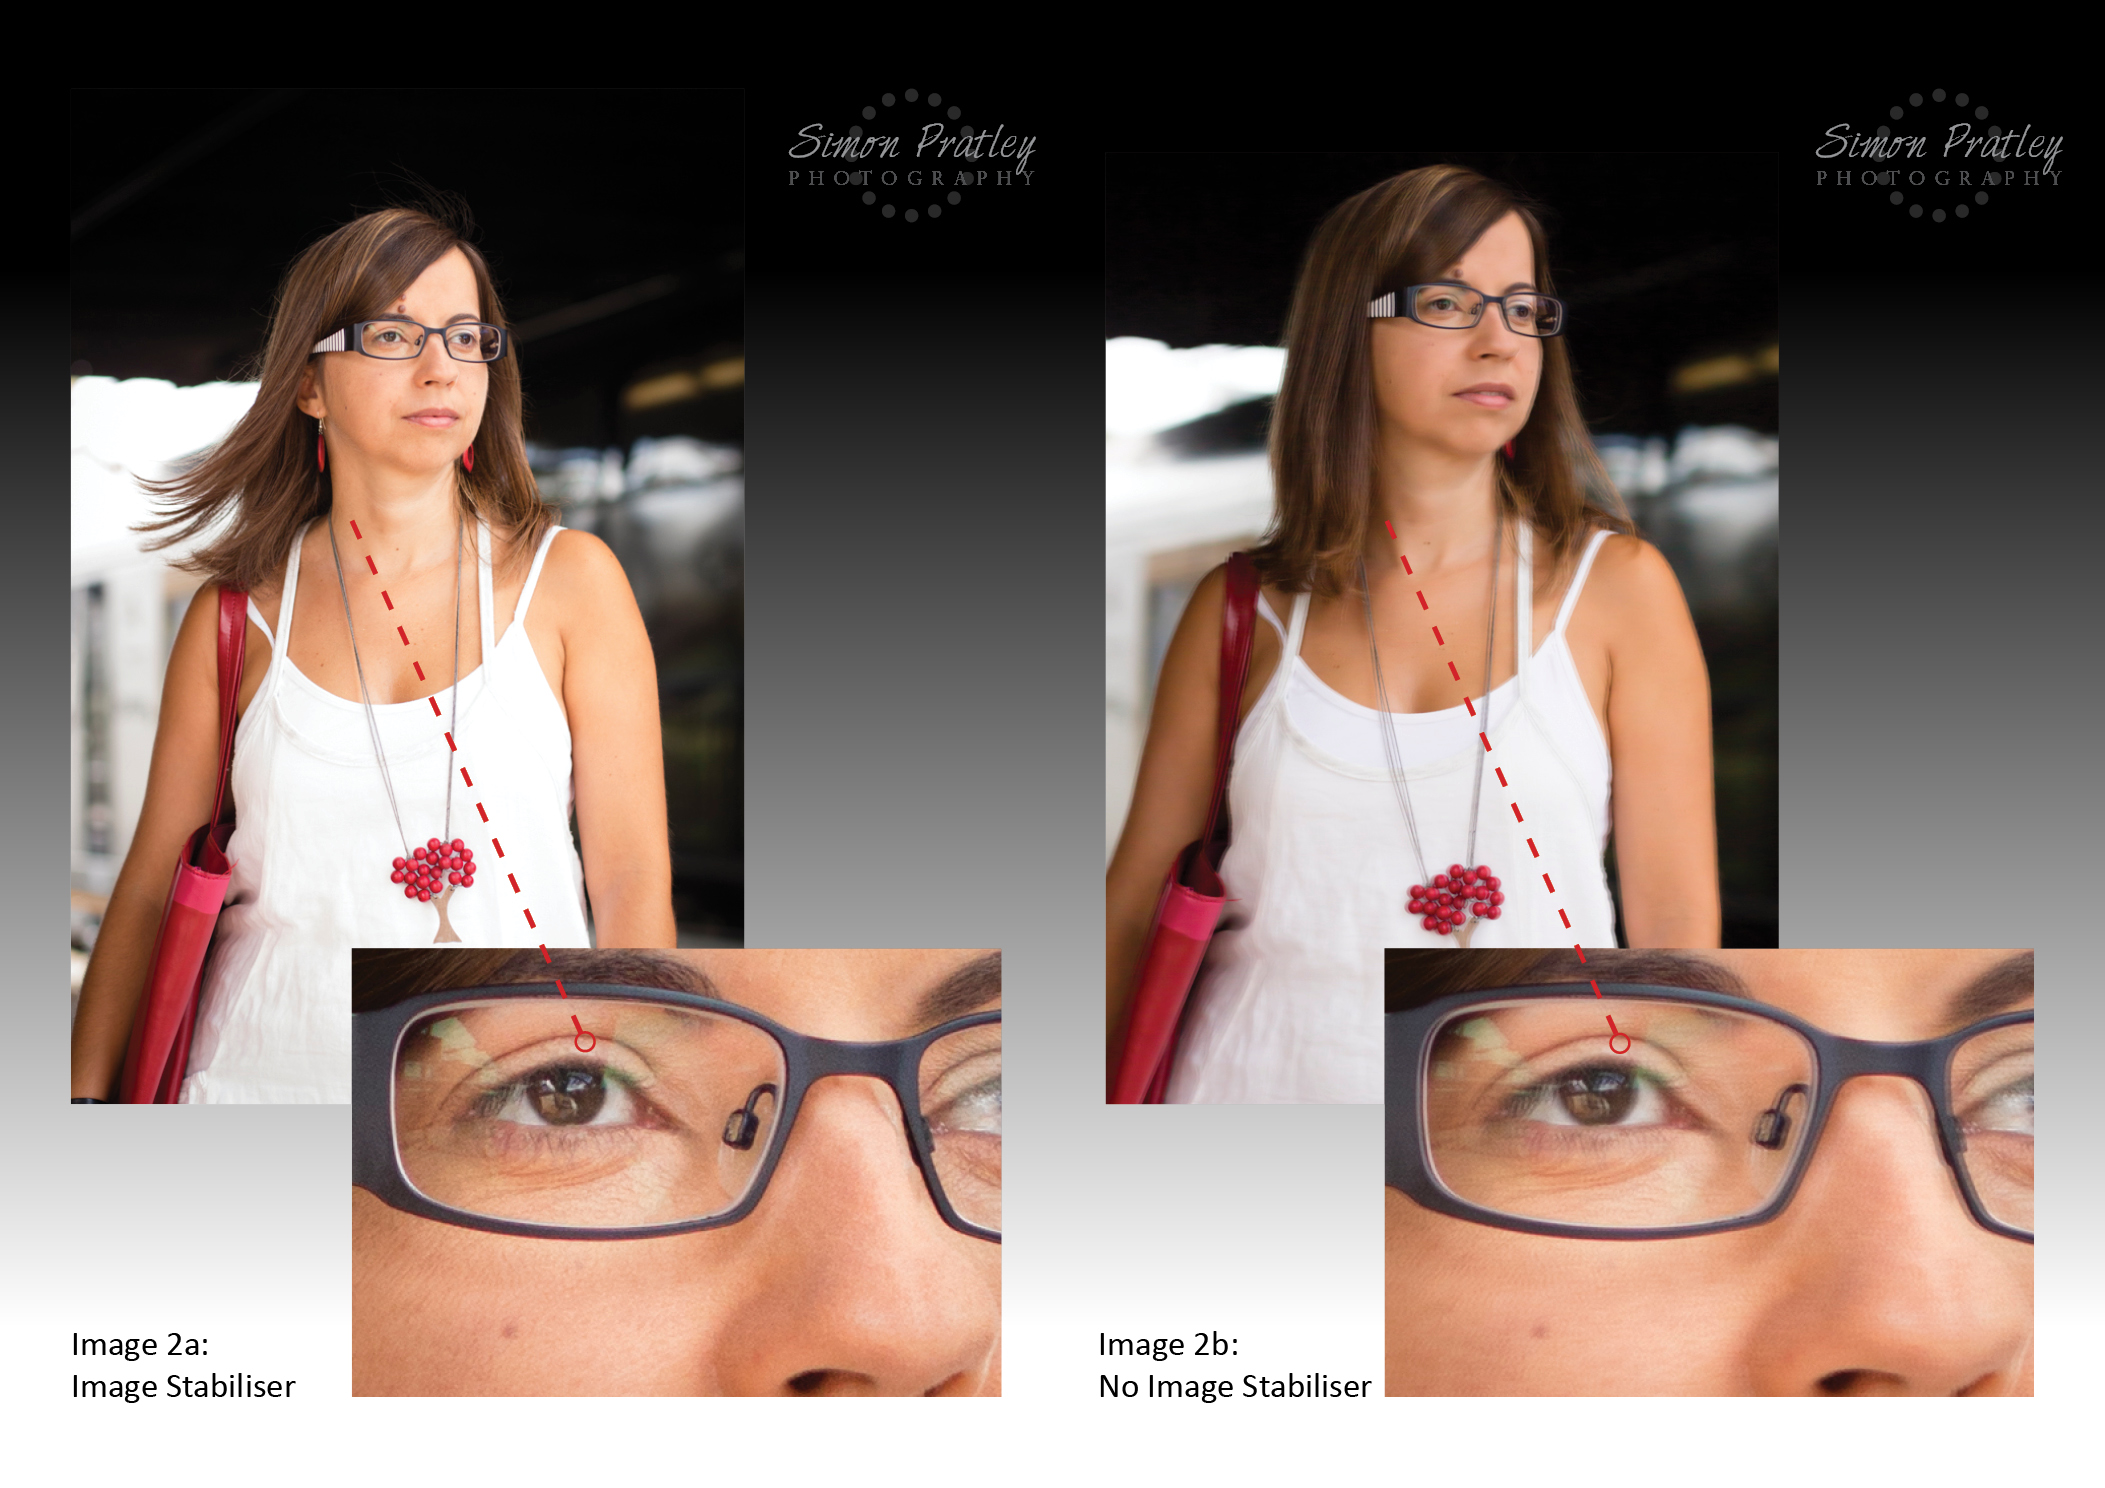
Sometimes the effect of the Image Stabiliser is only subtle, however it can make the difference to having a sharp photo or something not quite sharp enough.
The image stabilisation setting is great for photography and has helped many photographers take photos that couldn’t otherwise be taken… but it does have its limits. If you are using a tripod or any stable surface, the image stabiliser should always be turned off. This is because the image stabiliser automatically moves slightly trying to compensate for any camera shake, even though the camera is stable. Ironically the result will be a blurry image!
Having the option to use an image stabiliser can open more opportunities for low light hand help photography. It gives the photographer more freedom by not always having to depend on or lug around a tripod… let’s face it, tripods can make photography really slow and as photo opportunities often happen quite fast, we need to be as quick and flexible as possible. That is why image stabilisation is a great feature and should be something to be considered before buying your next camera or lens.